E23 | AC Airflow Issue, Shellac Removal | Ask This Old House
Season 23 Episode 23 | 23m 42sVideo has Closed Captions
Troubleshooting AC airflow; spotlighting Shelby Barnhart; removing shellac from wood.
Ross Trethewey troubleshoots a Miami home's hot and cold spots. He conducts a home performance assessment to check airflow and offer solutions; AskTOH highlights metal fabricator, Shelby Barnhart, who worked her way up from a blacksmith apprentice to starting her own successful business; Mauro Henrique demonstrates how to remove a shellac finish that was improperly applied to a wood window trim.
Problems with Closed Captions? Closed Captioning Feedback
Problems with Closed Captions? Closed Captioning Feedback
Funding for THIS OLD HOUSE is provided by The Home Depot and Renewal By Andersen.
Support provided by:

E23 | AC Airflow Issue, Shellac Removal | Ask This Old House
Season 23 Episode 23 | 23m 42sVideo has Closed Captions
Ross Trethewey troubleshoots a Miami home's hot and cold spots. He conducts a home performance assessment to check airflow and offer solutions; AskTOH highlights metal fabricator, Shelby Barnhart, who worked her way up from a blacksmith apprentice to starting her own successful business; Mauro Henrique demonstrates how to remove a shellac finish that was improperly applied to a wood window trim.
Problems with Closed Captions? Closed Captioning Feedback
How to Watch Ask This Old House
Ask This Old House is available to stream on pbs.org and the free PBS App, available on iPhone, Apple TV, Android TV, Android smartphones, Amazon Fire TV, Amazon Fire Tablet, Roku, Samsung Smart TV, and Vizio.
Keep Exploring


This Old House Insider Newsletter
Get This Old House exclusive stories, tips, and behind-the-scenes information delivered right to your inbox every month.Providing Support for PBS.org
Learn Moreabout PBS online sponsorship♪♪ Kevin: On "Ask This Old House," our experts travel across the country to answer questions about your house.
♪♪ Today, do you struggle to keep your home constantly cool?
Ross helps a homeowner troubleshoot their A/C problems.
Then we meet with a blacksmith who forged ahead, turning her passion for working with metal into a career.
And Mauro helps a homeowner remove some scaly shellac.
Mark: Oh, my gosh.
Arch: Oh, wow.
Mark: It came right off.
Kevin: On "Ask This Old House."
Ross: I'm headed to Miami, Florida, to help a homeowner out who wrote in about comfort problems.
They've noticed hot spots and cold spots in their house, and they can't seem to get the comfort right.
Anytime I hear about that, I'm thinking about pinpointing where the issue is.
Is it within the ductwork?
Is it within the building enclosure?
Is it with the A/C unit?
And so that can take a full day of testing.
To get jump-started on that, what I've asked them to do is send me their floor plans.
With that information, I can run a heating and cooling load calculation and we can get started with the analysis.
Hey, you must be Khory.
Khory: Yes, sir.
How you doing, Ross?
Ross: Nice to meet you.
Khory: Likewise.
Welcome to my home.
Come on in.
Ross: Yeah.
Glad to be in Miami.
I'm moving a little bit slower these days.
I got a boot on, but, um, but glad to be here.
And hopefully we can solve your problems.
You wrote in about hot spots and cold spots.
Khory: Yeah, I wrote in because at night when I'm trying to sleep in the primary bedroom, the temperature is like 6 to 7 degrees warmer than the rest of the house.
Ross: Wow.
Alright, so you're cranking down the temperature, trying to get it Arctic cold in one area to make it comfortable in another area.
Khory: Exactly.
Ross: Yeah.
Got it.
Okay, well, can we take a look at it?
Khory: Okay.
Perfect.
It's this way.
Ross: Alright.
Beautiful house.
Khory: Thank you.
Ross: So this is the bedroom?
Khory: Yes.
Ross: Alright, so tell me a little bit about it.
Is it always hot, always cold?
Because I can feel the temperature difference right now.
Khory: Yeah.
It's always warmer in here than it is in any other part of the house.
Ross: Okay.
Do you notice a difference between winter and summer or daytime to nighttime?
Khory: I notice it more at night because that's typically when I close the door to go to sleep.
Ross: Got it.
Okay.
And then have you had any companies take a look at it?
And did they make any recommendations?
Khory: Yeah.
We had one company come out and they suggested that we install the jump vent.
Then that improved it minimally.
It helped decrease the temperature by maybe a degree or two.
But there's still like a six-degree difference between here and other parts of the house.
Ross: Got it.
And the one thing about a jump duct is it's usually there to provide a return air path from the bedroom back to the main living space where the central return is.
So that's usually a step in the right direction.
But in your case, obviously it didn't solve it.
Khory: Right.
Ross: Got it.
Anything else did they recommend?
Khory: We also got these remote thermostats.
So what this does is I can set the temperature to this room and I can make it to where it's comfortable, but it makes other parts of the house Arctic cold.
Ross: Yeah.
So that becomes the sensing point.
So the system is driving the A/C system to make that nice and comfortable, but it's going to make it really cold in other parts, as you said.
Khory: Right.
Yeah.
Ross: Yeah.
So the first thing I would recommend is a Manual J, which is a load calculation.
And to do that I would take measurements of all the widths, the lengths, and the heights of all the rooms, measuring the windows, the wall insulation, the roof insulation.
So getting an understanding of the thermal envelope of your house.
Fortunately, you sent me the floor plans and some information about your house, so I already got a head start on that.
That's going to tell us how much air we need to move into this room to actually keep you comfortable.
Khory: Okay.
Ross: The next thing we're going to do is a home performance assessment.
And what I mean by that is I'm going to do some tests on the enclosure and on the duct system to make sure that your HVAC system is actually performing properly and the fact that it's matched up with the load of the building.
Khory: Okay.
Ross: Alright?
So I'm going to meet a local contractor who's going to be pulling up right about now.
So I'm going to go meet Genry, and he's going to give us a hand.
Khory: Alright.
Perfect.
Sounds good.
Ross: Thank you.
Khory: You're welcome.
Ross: Hey, Genry.
Good to see you.
Genry: What's going on, guys?
Ross: Meet Khory.
Khory, Genry.
Khory: How you doing?
Genry: Nice to meet you, sir.
Khory: Likewise.
Ross: So we need to see the air handler.
Where's that at?
Khory: Alright.
Right here in the garage.
I'll show you.
Ross: Alright, let's do it.
Khory: Alright.
Ross, it's up ahead on your left.
Ross: Yeah, yeah, I see it there.
Okay.
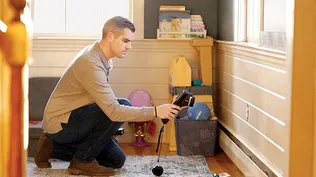
Let me take a picture of the rating plate.
Grab that while we're here.
Okay, so Genry and I are going to go take a walkthrough of the exterior, take a look at the condensing unit, and then we'll check back in with you in a little bit after we do some tests.
Khory: Alright.
Perfect.
Ross: Sound good?
Khory: Yeah.
Ross: Alright.
Cool.
Khory: Alright.
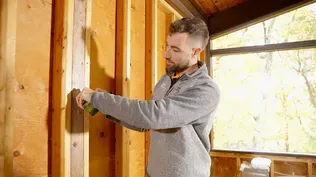
Ross: When I'm doing an exterior walkthrough, I'm paying close attention to the HVAC equipment, the terminations, the roof venting, like soffit vents, to gain a better understanding of the home's layout and systems.
And now we're going to head inside to get the blower door set up.
The blower door test will measure the home's air leakage rate.
For the blower door test, we need to open all interior doors, close all exterior doors and windows, and ensure all exhaust fans, HVAC systems, and combustion devices are off.
Once set up, we can turn on the fan and depressurize the home in order to measure the air leakage.
♪♪ Genry: CFM50 number came in at about 1,700.
Not great.
So we're going to do another test for that.
I actually closed all the interior doors, and I turned the HVAC on.
Ross: With just the HVAC system running, the house is depressurizing to -0.9.
This means that outdoor air is being pulled into the living space.
Typically this is indicative of supply duct leakage.
We will run some additional tests to confirm.
We like to see less than 3 pascals, so this is good.
It means we typically do not have a return-air-pathway problem.
So Genry is now going to use a flow hood to measure the airflow coming out of the supply air vent.
And we're going to measure it with the bedroom door open and with the bedroom door closed.
Genry: Alright.
With the bedroom door open, less than six.
Ross: Less than six.
Okay.
Let's do the same test with the bedroom door closed.
Genry: Yeah.
With the bedroom door closed, we have 61.5.
Ross: We got a difference there.
Alright.
We're gonna do the same test in the bathroom, measuring the flow through the exhaust fan register.
Alright, we're here at the air handler.
It is a three-ton air handler.
It's an upflow unit.
And we're going to test the static pressure on the unit and the airflow.
Nice.
I'm going to be using a digital manometer.
As you can see, we're in the yellow range.
We aren't moving as much air as we'd like.
There's definitely room for improvement.
Now that we've confirmed that we have duct leakage, I'm introducing theatrical smoke to the duct system to help us pinpoint the leaks.
Alright, Khory, we finished all the tests.
I've got some good news and maybe not so great news.
Khory: Yeah.
Ross: So for the great news, we've got a proper-size HVAC system.
So we have a three-ton air handler and condenser.
That is the right size for this size building in this load.
We also confirmed that the unit itself has plenty of life left.
It's eight years old and we should get 15 to 20 years life out of that unit.
Okay, for the not so great news, we confirmed that we're not moving enough airflow to the bedroom.
Alright?
So the bedroom is only getting about 135 CFM with the door closed.
We really need to be about 170.
So we compare what we measured to the load calculation.
And we're short.
And that is exactly why you're having the temperature issues that you are experiencing, right?
We also confirmed that we have some duct leakage.
So we have some duct leakage in the garage and some in the attic, about 20% duct leakage overall.
So meaning that 80% of the air that you're paying to condition is making it back to the house, 20% is being lost to the attic and to the garage.
So of course there's some energy improvements there by making that change.
Khory: So what do you suggest we do to fix this?
Ross: So there's a couple of different options.
And it really all depends on budget.
The first thing I would start with is the return side of the equation.
So the air handler is easy and accessible, and by sealing up the return, putting in a proper-size filter and a proper-size return-air grille.
By doing that, we're going to drop the static pressure.
We're going to move more airflow to that system, and it's really easy and accessible to get at because it's right there in the garage.
Khory: Okay.
Ross: The next step would be to tackle the supply side of the equation.
And that's looking at the ductwork in the attic to put in the right-size ductwork that's properly sealed so we can move the right amount of air to every room.
And the third thing would be to put the HVAC unit inside the conditioned space.
And by doing that, typically in this type of arrangement, I'd recommend that we build a closet effectively around the HVAC unit, insulating that, and air-sealing it.
Therefore, the HVAC unit becomes now part of the house and not part of the garage.
And that's going to reduce the amount of condensation and the energy performance that it's seeing right now.
Khory: Got it.
Ross: What do you think?
Khory: Yeah.
Sounds good.
Sounds like we have a lot to do.
Ross: Alrighty.
We'll keep you posted.
If you have any questions, I'm here to help.
Khory: Hey, will do, Ross.
Thank you.
Ross: Thanks, Khory.
Take care.
♪♪ Kevin: As you know, on "Ask This Old House," we are always looking for contractors worth celebrating.
Today we meet Shelby Barnhart, a metal fabricator from northern Connecticut who has embraced the communal spirit of learning and performing the metalworking trades.
[ Metal clinking ] ♪♪ Shelby: There's endless things you can make with a hammer and an anvil.
I've made about 5,000 hinging rings, a few hundred horseshoe wine racks, a few hundred decorative hooks, lots of fireplace cranes, probably more fireplace cranes than I can even count.
The welding process is definitely my favorite out of all of it.
It's just nice.
It's soothing.
It never gets old.
[ Laughs ] I'm Shelby Barnhart and I am a metal fabricator.
It's a country carpenters barn that my parents put in in 1993.
And then when my husband and I bought it, we converted it into my workshop.
♪♪ I got a lot of practice in ninth, 10th and 11th grade in auto shop, just welding any time I could.
And then I think it was the summer I turned 15.
I volunteered at the Mystic Seaport as a junior volunteer, and I spent a few summers working under Craig, who was awesome.
That's where I learned all the traditional skills.
He pushed me to work hard, so I had to make 100 hooks the way he liked them before I was allowed to start another project.
And then when I graduated high school, I spent a year working with a metal artist, and she taught me a lot of modern blacksmithing techniques, and that was just a great experience working with someone that does purely art.
I did those when I was an apprentice under Susan Madacsi.
I was about 17, 18 when I did those.
That's where I learned about propane forges.
She used a propane forge instead of coal, and the propane is just more efficient.
It's easier.
It's cleaner.
So, this is a 4x8-foot boiler plate that was made into a welding table by one of my mentors that I grew up working with.
He had two of them, so I got this one from him when I was about 15.
After about a year and a half with Susan and at this welding job, I decided to go off on my own.
And I did a lot of little projects at first locally, like repair jobs, railings, and then I had started to make an online website doing wine racks and hooks and just little intricate things.
Those are horseshoes.
I didn't make those.
I buy those and then I forge them into other things.
My dad actually told me.
He was like, "Why don't you come up with some type of handrail you can just send people?"
He was like, "What if you could just ship it like you ship your other stuff?"
And then I put those on my website, and they honestly just took off unexpectedly.
I wasn't really thinking they were going to do so well, and they did.
I was able to get picked up by some pretty major retailers to dropship the product for them and have them on their website, which was a complete game changer for me.
I've made about 15,000 handrails so far and we're still going.
[ Laughs ] Yeah.
Alright.
Put that in the front of your bag, okay?
I have three kids.
During COVID, my oldest was in kindergarten.
I had a preschooler, and then I had a 1-year-old.
It was really lots of really two-hour chunks of working just because you can't hold kids' attention for that long in, like, this one little area.
I did a lot of research on lean manufacturing and on the process of just minimizing everything down to the bare bones of what you need to get each step.
It was just purely utilizing my time to my advantage because I had no other option.
Nothing would get done otherwise.
So now that my kids are in school, I'm hoping to scale back up and just have more in production.
A good day for me would be everybody nicely going to school and then taking the dog for a walk... ...and then coming into the shop, putting on an audiobook, and just getting to it.
I usually start by cutting all of my material out, and then once I'm finished cutting, then I start scrolling every handrail, so everything is done just big chunks.
So it's all cutting and deburring, all scrolling, and then I'll spend like three or four whole days welding and then I'm processing orders.
And then I get another steel load.
And it kind of repeats the process.
And I've got just an old drill press.
This is actually my dad's.
It's very sentimental.
So I will be using that for as long as possible just because.
My dad was a huge influence on me.
My current shop was actually, like, his workshop and storage area that he had all of his classic cars in.
So growing up, I always thought it would be the coolest workshop.
I always wanted it for my workshop.
And then when we actually bought my childhood home, I got to create my space in here, which has just been really -- I don't know -- cool.
And it's hard to even just describe thinking about.
He passed away six years ago from ALS.
So, the barn itself too is very sentimental just because my dad had his stuff in here.
Yeah, good, good memories.
And I'm glad that I'm able to kind of, like, make new memories with my kids here.
If I would give any advice, I would find a mentor, first and foremost, or many.
You can really learn so much.
They've been through a lot of things you wouldn't even think of, and just the wisdom from their stories is priceless.
I am a certified teacher for the state tech school system.
I love sharing what I do.
I just think -- I don't know -- it's not even really a super-common trait anymore.
Everyone's retiring, and there's not enough people coming into the workforce to replace those that are retiring.
So they need a lot more people.
They need a lot more welders out there.
Like, how many more handrails does the world need?
We're going to find out.
[ Laughs ] Kevin: Do you know a contractor worth celebrating?
If you do, please write us and tell us who they are.
♪♪ Mark: Hey there, Mauro.
Mauro: Hey, Mark.
Mark: Nice to meet you.
Mauro: Nice to meet you.
Mark: Come on up.
Mauro: Okay.
Look at this house.
Nice.
I see wood everywhere around here.
Mark: Yeah.
How's your day going?
Mauro: Everything is good.
So you also wrote me about something going on with the trim in your house?
Mark: Yeah.
This is my wife Arch.
Mauro: Arch, nice to meet you.
Arch: So nice to meet you, too.
Mauro: Okay.
Tell me a little bit.
What's going on with the woodwork?
Mark: We've noticed that there's a bit of a texture that's developed over the years.
Mauro: Okay.
What type of wood do you think you have in here?
Mark: I mean, talking to some people around here, I think it's gumwood because that tends to be in a lot of the houses, but I'm not sure.
Mauro: Yeah, I would say yes because I can see the window sill has this nice grain going around and also around the house, but I also see this very heavy texture on the window here.
Mark: Yeah, exactly.
What causes that?
Mauro: Well, there's a couple of reasons.
So we get gumwood.
Years back, shellac was a very popular finish to get on.
Dries faster.
But when you see a texture like this, a couple of reasons that causes that.
Number one is applying multiple coats and you're not respecting the drying time in between coats, okay?
It has no time to dry, and that creates this texture.
And another reason because we are in New England -- cold weather, right?
And the house temperature, if it's not in the right temperature to apply any finish also can create this texture, very heavy texture here.
Arch: Well, is there anything we can do to fix it?
Mauro: There's a couple ways you can do it.
You can be getting a sander or a sandpaper and be here forever.
[ Laughter ] It'll take you a long time, but I got a different technique that we can get it done faster.
But I'd like to do a test first.
Arch: Sounds great.
Mauro: Be right back.
Mark: Alright.
♪♪ Wow, that looks good.
Mauro: Wow.
It went down to the bare wood.
Mark: Yeah.
Mauro: Look at that.
Mark: How did you do that?
Mauro: Well, I used the natural alcohol with a small brush.
We put on, brush it on, and leave it for one or two minutes.
I go back with the scrub pad and goes like this.
Takes down to the bare wood.
Mark: Okay.
Mauro: Alright.
Now we know how to do it.
Let's take down the blinds.
Mark: Alright.
Arch: Great.
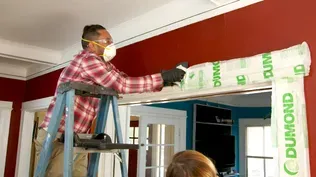
♪♪ Mauro: Just go behind the green tape.
Okay?
♪♪ ♪♪ Alright, we got the alcohol.
Let me show you how we're going to start to remove the shellac.
Dip the brush in there a little bit.
Just spread right around here.
Just give it another pass.
Alright.
Let's wait a few minutes.
We'll come back and we'll try to remove that.
Alright?
Mark: Alright.
Arch: Sounds good.
♪♪ Mauro: Alright, guys, I think we're ready here to try and see if that comes right off.
But before we do that, let's put the safety gear -- goggles, masks, gloves.
Ready?
Both: Yeah.
Mauro: Alright, Let's try where we put the natural alcohol.
Let's see how it comes out.
[ Scraping ] Mark: It's a lot better than sanding.
[ Both laugh ] Mauro: Here it comes right off.
Oh, look at that.
Arch: Do you have to work fast when you're doing this?
Mauro: Uh, no.
This is a slow-process job.
If you work fast, you might damage the wood or it might, you know, put a scratch on it.
We don't want that.
Alright?
Let's go.
Just like that.
Alright, let's try this little spot here.
Mark: Oh, my gosh.
Arch: Oh, wow.
[ Both laugh ] Mauro: Alright.
Mark: That came right off.
Mauro: Yeah.
That's the old shellac right there.
Mark: Yeah.
Wow.
Mauro: There it goes right into the bucket.
Arch: [ Laughs ] Mauro: Just keep applying the alcohol.
It's always good.
Never too much.
You want to go slow so you don't damage the wall.
♪♪ Mark: It's coming right off there.
Mauro: Now you notice also the wood has a lot of different profiles.
So the scratchpad also works really well for that.
Well, guys, you did a great job.
All the shellac is gone.
Now it's time for us to lightly sand and start to get the first coat of polyurethane on.
Arch: Awesome.
Yeah, it looks great.
There's a lot of work, but worth it.
Mauro: It's worth it, right?
Both: Yeah.
Mauro: Alright, let's go to the phase two now.
Mark: Mauro, what grit sandpaper is this?
Mauro: Uh, this is 220, Mark, so make sure that the surface is nice and smooth before we apply the polyurethane.
Alright, guys, how are we doing here?
Mark: Think it looks good.
Mauro: Nice and smooth?
Arch: Yeah.
Mauro: I think it looks pretty good.
Alright.
We're going to do some vacuum and then we'll be ready to first go to polyurethane.
Alright?
Mark: Alright.
Arch: Awesome.
Mauro: Okay.
♪♪ Alright.
Ready for the first coat of polyurethane?
Arch: Oh, yeah.
Mauro: Alright.
This is what we have here.
We're going to use a water-based polyurethane.
Reason number one, it does not off-gas so much like oil does.
I know you have a little baby inside of the house, right?
Arch: Yeah.
Mauro: Okay.
This is going to be a satin finish.
Like you guys like the satin finish for the winter.
Mark: Yep.
Arch: Mm-hmm.
Yep.
Mauro: Matches what you have around the house.
And we're ready for the first coat.
Mark: Yeah.
Let's do it.
Arch: Awesome.
Mauro: And this dries in about two hours.
We're ready for the second and the final coat.
Mark: Okay.
♪♪ Mauro: Yeah.
Go all the way down to the border with one stroke.
Yeah.
Beautiful.
♪♪ Beautiful.
Alright.
Cool.
You're going to have about two to three coats.
Arch: Okay.
Mauro: Okay?
Because this material is very thin.
Arch: Yeah.
Mauro: And the wood will absorb a lot of this.
♪♪ Mark: I know.
It looks great.
Mauro: Look at that.
Mark: Yeah.
Arch: So cool.
I mean, look at the difference between the new and the old.
Mauro: Huge difference.
Old window.
New window.
Mark: Yeah.
Mauro: Right?
You guys did a great job.
It looks really good.
Next thing you guys got to do, wait about two to three hours, and then it's time to, you know, lightly sand again, put the second coat on.
You might need a third coat.
Okay?
Because we went down to the bare wood and then, if a third coat needs it, just apply the same way you did it with the first one.
Alright?
Arch: Sounds good.
Mark: Yeah.
Mauro: Guys, enjoy.
You got a big window here to do.
Mark: Yeah.
We've got more work to do.
Mauro: But the good thing is you know how to do all the sequences.
Good luck.
Mark: Alright.
Thank you.
Arch: Thank you so much for everything.
Mauro: Anytime.
♪♪ Kevin: Next time on "Ask This Old House," does your lawn have brown spots?
Lee: This is black magic right here.
This is gold.
Kevin: Lee shows you how to get your grass green and lush again.
Then is your ductwork noisy?
Ross tells you why that is and how to fix it.
And Mark heads to Austin to help a homeowner repair their foundation.
Mark: Alright.
Nice job.
Kevin: All that on "Ask This Old House."


Support for PBS provided by:
Funding for THIS OLD HOUSE is provided by The Home Depot and Renewal By Andersen.